Digital Denture Resource Center

Harness the accuracy & efficiency of digital impressions with Maverick’s first-in-class digital design & 3D printing techniques to get a truly superior workflow & result. 

Digital Dentures with Maverick

OUR GOAL:

Maverick has invested into best-in-class technologies, advanced materials & improved workflows to create a superior clinical experience with 3D Printed Dentures. This means stronger materials, faster turnarounds & more precise fits by harnessing the power of digital for your denture cases.

PRINTED DENTURE MATERIALS:

 Printed Lucitone Base: Maverick utilizes Dentsply’s Lucitone Print resin for its Digital Denture bases. Offering proven biocompatibility, esthetics & improved characteristics: The high-impact resin exceeds ISO standards for impact resistance, delivering outstanding durability and strength. Featuring a smart polymer technology, the body-activated material (BAM!) nearly doubles its ability to resist breakage when worn. Future repairs & relines are easy to perform with standard acrylic methods.

Printed Denture Teeth: As a premium-level material, Maverick prints Digital Denture teeth with Dentsply’s Digital IPN tooth resin. This resin offers the same superior durability of traditional IPN and outperforms competitive 3D denture tooth materials available today in terms of wear resistance.

PRICING & TURNAROUND:

Ahead of the official product launch, prices will be heavily discounted.  

*Turnaround time does not include delivery days.

HOW IT WORKS, 2 DIFFERENT WORKFLOWS:

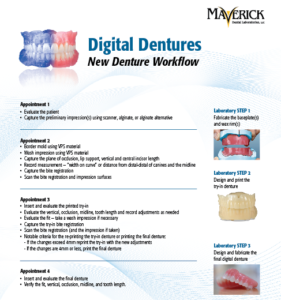
New Denture (see full video below for further instruction):

The process begins with your approved wax rim for set up with proper markings for midline, smile lines, canine positions, VDO & bite relations. Taking a wash of the intaglio of these wax rim bases for border molding is also key here.

If you have a digital impression system, perform a 360 degree scan of all surfaces on the wax rims (including buccal, lingual & intaglio surfaces). Alternatively, if you do not have a scanner, simply mail in your wax rim for fabrication & request “digital denture try-in”.

From here, Maverick will design & print a try-in denture. When you receive this try-in, it will not contain wax like a traditional denture setup. Rather, digital denture try-ins are solid printed resin, so please mark any needed adjustments with a bur including midline adjustments & occlusal equilibration. Make sure to be specific in RX notes with any needed design changes. If you are ready to take the denture to finish, simply take a 360 degree scan of the try-in denture or mail us the try-in denture so that our lab can take it to finish!

Duplicate an Existing Denture (see full video below for further instruction):

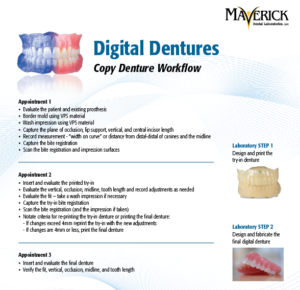
Duplicating a current denture (with small alterations possible) is one of the easiest workflows with the help of Maverick’s Digital workflows.

If the original denture needs retention improvement, take an intaglio wash impression in the denture base with border molding & bite registration. Perform a 360 degree scan of the denture (all surfaces: buccal, lingual & intaglio) to send to Maverick with instructions to duplicate denture.
 

DENTURE TRY-IN CHECKLIST (send with your Try-ins):

 When evaluating your printed try-in denture, include or utilize this checklist to ensure success before taking the case to finish!
Please click here to submit the Clinical Try-In Checklist

Resources

COPY DENTURE WORKFLOW

Click to access PDF:

NEW DENTURE WORKFLOW

Click to access PDF:


COPY DENTURE TUTORIAL

Click to watch video:

NEW DENTURE TUTORIAL

Click to watch video: